The thermostat is an important part of your engine’s cooling system. It acts as a valve to keep the cooling system from fully functioning until the engine reaches its optimal operating temperature. Once the engine has reached the correct temperature, the valve in the thermostat will open allowing the cooling system to engage and keep the engine at the correct operating temperature and prevent the engine from overheating. You can learn more about how the cooling system works by visiting the Cooling System section of this website.
Why Is The Function Of The Thermostat Important?
Without the thermostat in an engine cooling system, the engine would take much longer to warm up and reach the optimal operating temperature. The radiator coolant would constantly be flowing through the engine, preventing the engine from warming up and running as efficiently as it was designed to do. Your engine is designed to withstand and function properly with the temperature of the engine. If your engine runs too cool, it will run rich and burn more fuel to run properly. Also running an engine too cold you risk the engine building up carbon deposits because the engine is not warm enough to burn off and expel dirt and gunk that will form in the engine. Also, the cabin HVAC (heating, ventilation, and air conditioning) system will take much longer to warm up, preventing your heat in the car to take much longer to work and may never warm up as hot as it could be. No heat in the car will not be pleasant on those cold days.
-
- Running Cold
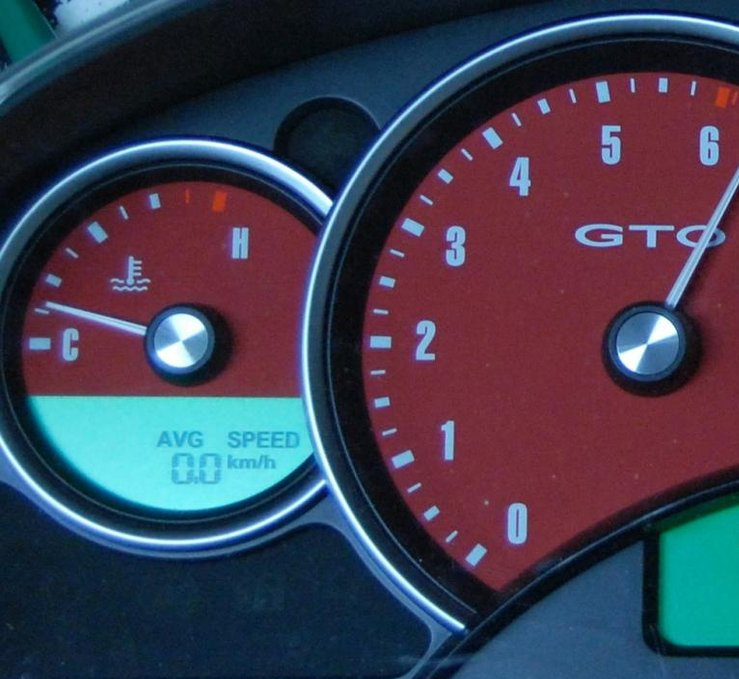
-
- Running Hot

Optimal Engine Operating Temperature
Both the LS1 Engine found in the 2004 Pontiac GTO and the LS2 engine found in the 2005-2006 Pontiac GTO’s have an optimal engine temperature range of 195-220º F degrees Fahrenheit (91-104º C degrees celsius). The average being about 210º F. This is for stock engines with the aluminum engine block and aluminum cylinder heads.
When you start your engine cold, the thermostat valve will be closed, preventing the coolant from cooling down the engine. Once the engine reaches 187º F, the valve on the thermostat will open allowing coolant to run through the engine preventing it from overheating. This does not mean the engine will stay at 187º F because that is the temperature the thermostat opens. The engine temperature will continue to rise slightly. In my experience, the engine temperature will stabilize between 190-210º F depending on the outside weather temperatures. Should your engine go above temperatures of 219º F, the cooling fans will turn on and help to reduce the engine temperature.
2004-2006 PONTIAC GTO ENGINE TEMPERATURES
| PART | TEMPERATURE | DESCRIPTION |
| Engine | 195-220º F | Optimal operating engine temperature for performance and efficiency. |
| Thermostat | 187º F | Opens once the engine temperature reaches 187º F to allow coolant from the radiator to flow through the engine to maintain proper operating temperatures. |
| Cooling Fan 1 | 226º F | Should the temperature of your engine go above 225º F, cooling fan number 1 will turn on and continue to run until engine temperature is reduced to 219º F. |
| Cooling Fan 2 | 235º F | Should the temperature of your engine go above 234º F, cooling fan number 2 will turn on and continue to run until engine temperature is reduced to 226º F. |
| Ignition Disable (off) | 241º F | If the temperature of the engine goes above 240º F, both cooling fans will continue to run with the vehicle turned off for 255 seconds (4 minutes 15 seconds) |

Which Thermostat Should I Use?
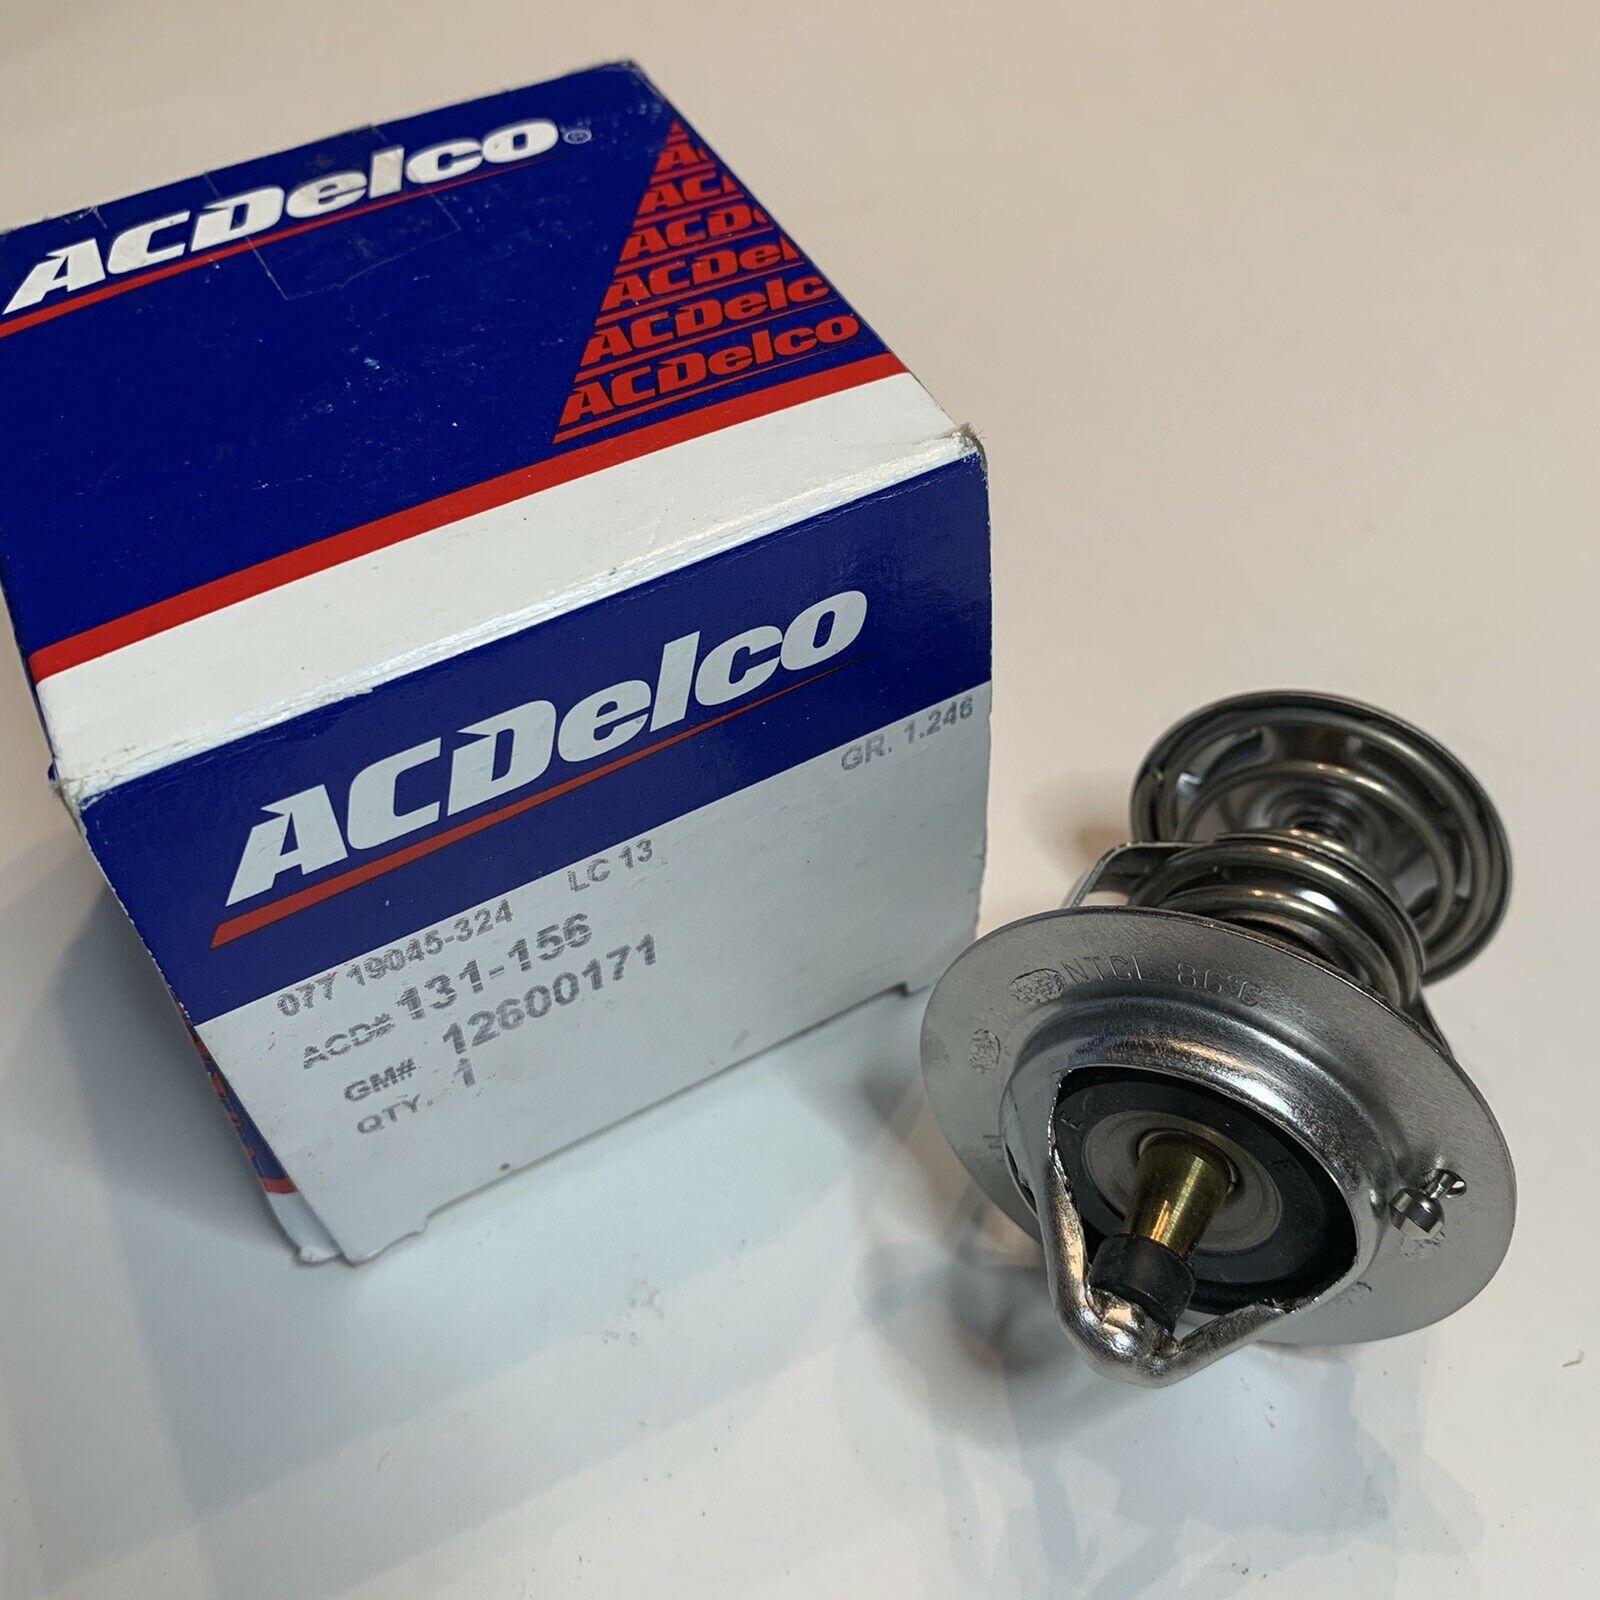
The factory O.E.M thermostat is an AC Delco, part number 131-156, and is a 187º F thermostat. There are also other companies that make a replacement thermostat and most should also be a 187º F valve opening. Thermostats will begin to open before the temperature rating they are designed for. Usually 3º F before the rating sometimes sooner, and will be fully open at 15-20º F past its temperature rating. The stock 187º F thermostat will begin to open at 184º F, allowing coolant to flow through the engine and begin the cooling process. The thermostat will fully open between 202-207º F should the engine temperature reach this point. This is for a stock engine with an aluminum engine block and aluminum cylinder heads. Both the LS1 and LS2 engines are designed to run at temperatures between 195-220º F. I do not recommend using any other thermostat than what was designed for the engine.
The following problems could occur if anything other than the stock thermostat is used:
- USING NO THERMOSTAT – This is just foolish. With no thermostat installed, this also means there is no valve to regulate the operating temperature of the engine and no chance for the engine coolant to stay cool. The second you start your vehicle coolant is being run through the engine, getting hotter and hotter as the engine heats up. By the time your engine reaches its optimal operating temperature, the coolant will also be the same temperature. The purpose of the radiator is the cool the coolant, but the coolant never received a chance to cool down. The coolant temperature will continue to increase and get even hotter, and eventually, your engine will overheat.
- USING A 160º F DEGREE THERMOSTAT – This is another wonderful internet myth. Using a 160º F thermostat does not keep your engine cooler. Yes, the valve on the thermostat will open faster to allow the coolant to run through the engine and begin the cooling process. The problem is, your engine does not know that is what you are trying to do. The engine is going to get hot no matter what you do. A 160º F thermostat will begin to open at 157º F, which isn’t much for an engine. The 160º F thermostat will be fully open between 175-180º. The coolant originally was not supposed to get hot until 187º F. Now you put a cooler thermostat in and the coolant starts getting hot at 160º F instead of the intended 187º F it was designed for. Your engine is now prematurely heating up your engine coolant. Again, just like running no thermostat, the coolant is trying to play catch up by running through the radiator to cool, but it’s too late because the engine already made the coolant hotter than it should be. The radiator can only cool so much, the cooling fans don’t come on until 226º F, and the end result is your engine is running hotter than it was with the stock thermostat.
Note: Tuners can recommend a 160º F thermostat for tuning reasons. But the tuners will also adjust the tune for the cooling fans to come on much sooner than the factory settings, and also adjust the air-fuel ratios accordingly. I know many high-performance parts websites will recommend the 160º F thermostat as a “performance part” upgrade. But this upgrade is only for advanced tuners and not made to be just thrown on the vehicle. Unfortunately, that is not made clear to the consumer, and there have been many testimonials of consumers damaging their engine by switching to a 160º F thermostat without the proper knowledge. The correct way is to use the stock thermostat and have the cooling fans come on sooner, which can also be performed by a professional tuner.
THERMOSTAT REPLACEMENT – 2004-2006 Pontiac GTO
Replacing your thermostat is a fairly easy process. It can be done with very basic knowledge of hand tools and can be done in about 1 hour. The thermostat is located in the thermostat housing which is attached to the water pump. See the diagrams below for location.

| Note: Now would be a good time to replace the radiator hoses as well. Since you need to drain the radiator and cooling system to install the thermostat, you can easily replace the radiator hoses now as well. For more information, you can visit the “Radiator Hoses” section of this website. |
WHAT YOU WILL NEED:
| PART | EXPLANATION |
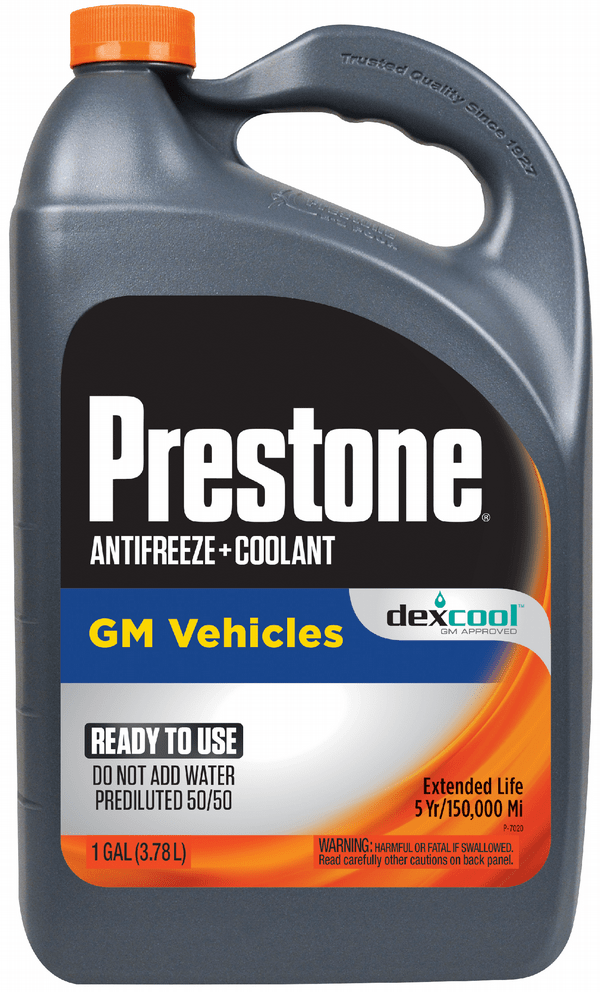 |
Antifreeze Cooloant 2 Gallons of Prestone DexCool “Ready To Use” This is the “Ready To Use” 50/50 premixed coolant. It is already mixed so you do not need to add any water. I am a fan of the Prestone brand, but you can use any DexCool brand of your choice. This will be used to refill the radiator. The radiator must be drained of coolant to replace the thermostat. |
 |
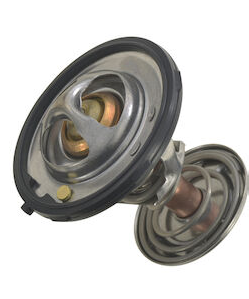
AC Delco 131-156 Thermostat This is the O.E.M. (original equipment manufacturers) 187º F thermostat. Again, I am a fan of using O.E.M. genuine parts. You are welcome to use another companies thermostat if you like. Just be sure it is the correct part number for your car, and make sure it is a 187º F thermostat. |
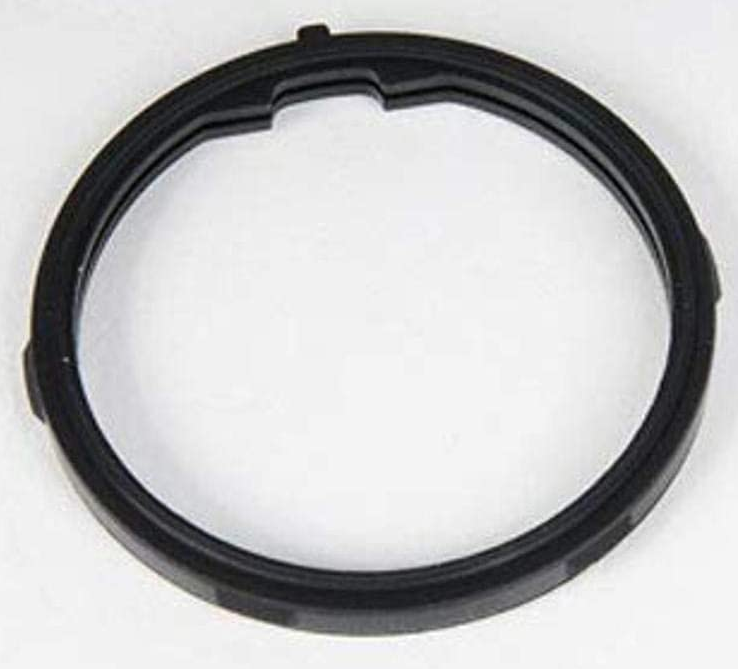 |
AC Delco Thermostat Seal 131-169 This is the seal that goes around the thermostat to prevent leaking from the thermostat housing. Again I am a fan of O.E.M. parts. Other company’s seals can be used. Be sure to check for the correct part number. It works much like a gasket, but is made of rubber and sits in the recessed area of the thermostat housing. Always replace this part, even if you think your current one is fine. Avoid leaks right from the start. |
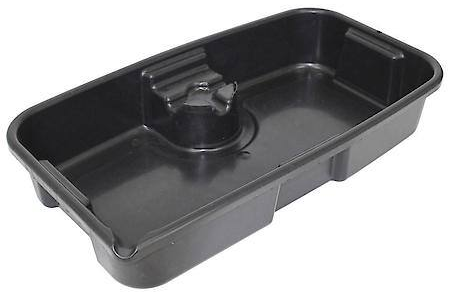 |
Fluid Drain Pan Drain pan capable of holding 2 gallons of fluid. Needed to catch the coolant drained from the radiator. |
 |
Adjustable Pliers Groove Joint, Adjustable, or Channel Lock Pliers. Used for removing the hose clamp holding the lower radiator hose to the thermostat housing. |
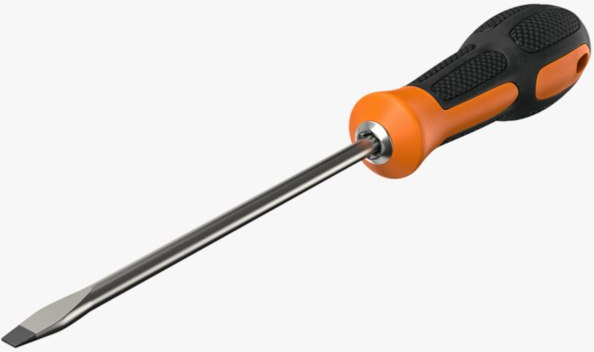 |
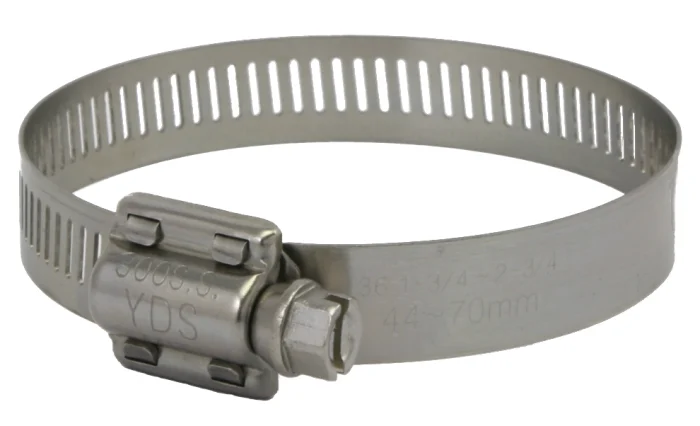
Flat Head Screwdriver Can be used to remove the worm gear hose clamps should you have them, and also loosening the radiator hose from the necks they attach to. Your vehicle may have a combination of both spring hose clamps and worm gear hose clamps. |
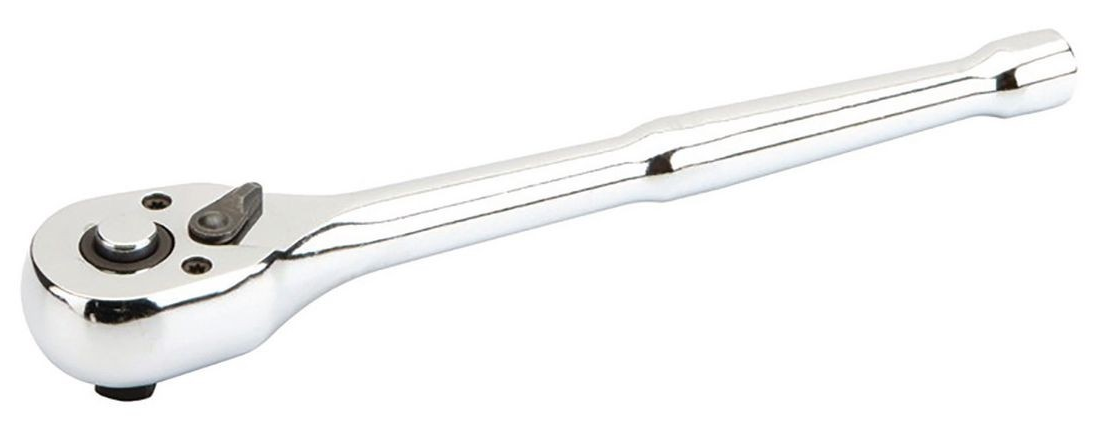 |
1/4″ Drive Ratchet 1/4″ (quarter inch) drive ratchet. Will be used to remove the thermostat housing bolts. |
 |
10mm Deep Well 1/4″ Drive Socket 10mm 1/4″ (quarter inch) drive deep well socket. This will eliminate the need for any extensions when removing the thermostat housing bolts. Will make the job much easier. Used to remove the 2 bolts holding the thermostat housing to the water pump. |
 |
3M Very Fine Hand Sanding Pad This item is also known as a “red scuff pad”. Will be used for very fine sanding and cleaning of the thermostat housing and water pump where they meet and connect. Will ensure proper sealing to prevent coolant leaks. |
 |
Permatex Blue Thread Lock Blue Thread Lock. Only use the “blue” medium strength thread lock. Will be used on the thermostat housing bolts during the installation procedure. |
 |
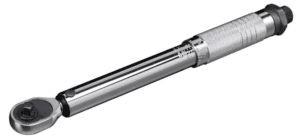
Torque Wrench 1/4″ (quarter inch) drive torque wrench capable of torque settings of 10 lb-ft or 120 in-lbs (inch-pounds). This will be used to accurately tighten the thermostat housing bolts without over-tightening them which can cause coolant leaks or damage the parts. |
Once you have everything you need, follow the procedures below:
- Remove the radiator shroud/air baffle. Make sure the engine is cold. Do not work on a hot engine. Pop the hood open and start removing the air baffle/radiator shroud (plastic piece covering the radiator). You will need to remove this to access the radiator cap, and it will give you more room to work when removing the thermostat.
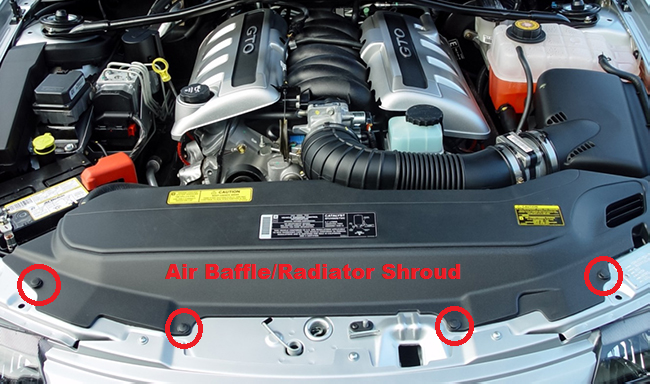
Use a small flathead screwdriver to remove the 5 push pin clips holding the air baffle in place. There is one more push clip on the far right side of the picture above (not shown). Just pull out the center part of the push clips to release the pins. Once the center of the clip is raised, you can pull out the push clips. Remove the radiator shroud/air baffle very carefully. There is a metal clip in the center of the piece underneath the shroud that you can not see. Pull the shroud/air baffle up from the center carefully to release the metal clip holding it down. - Drain the coolant from the radiator. Next, you will need to drain the radiator of all the coolant. On the 2004 Pontiac GTO, there is no drain plug on the radiator. So to drain the fluid you must remove the lower radiator hose located on the right side (facing the front of the engine). On 2005-2006 Pontiac GTO’s there is a drain plug that can be removed on the radiator to drain the fluid. You can find this on the right side (facing the engine) at the bottom of the radiator. Before draining the radiator be sure the engine is cool. You do not want to drain the hot coolant. You are going to need your fluid drain pan for this step. Approximately 1-2 gallons will be drained from the radiator. Place the drain pan underneath the draining area.
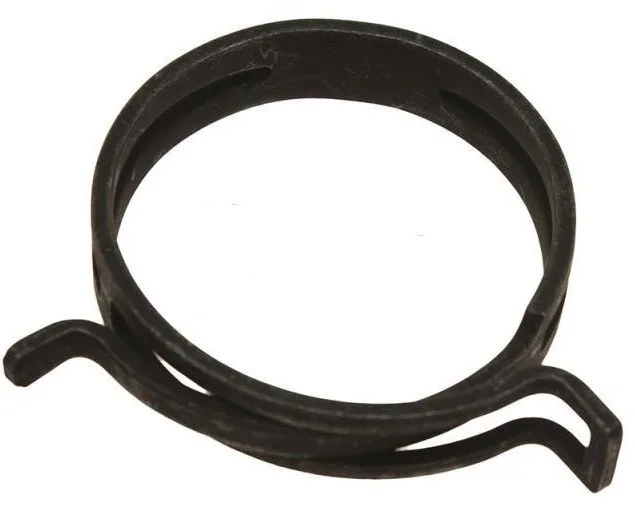
2004 Pontiac GTO – Use channel locks, adjustable pliers, or groove joint pliers to release the spring-type hose clamp from the outlet of the lower radiator hose. Slide the clamp away from the area it was holding as much as possible. If your hose clamp is not the factory spring clamp, you can simply use a flat head screwdriver to loosen the worm gear clamp and slide it away from the lower radiator outlet. Gently start pulling the radiator hose off the lower radiator outlet neck. You may need to use a flat head screwdriver to work the hose loose. Do this gently. The radiator is made of plastic and can break. Once the fluid is draining you can also loosen the radiator reservoir cap to allow faster draining. The factory 2004 Pontiac GTO does not have a radiator cap on the radiator. The coolant reservoir is used to fill the radiator. Once all the fluid is drained you can reinstall the radiator hose to the radiator.
2005-2006 Pontiac GTO’s – Loosen the drain plug found on the lower right side (facing the engine) to drain the coolant. This is a wing-style plastic drain plug so use care when removing it. Gently use a set of pliers to loosen the drain plug, once it is loose, unscrew the plug by hand and completely remove it. Once the fluid is draining, go back to the top of your radiator and remove the radiator cap. The fluid should be draining much faster now. Once all the fluid is drained you can reinstall the drain plug. Tighten by hand, then use the pliers to turn the plug a quarter to a half tun more.-
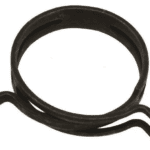
- Spring Clamp
-
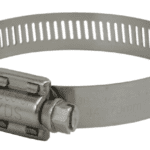
- Worm Gear Clamp
Note: Antifreeze coolant is poisonous to animals. As little as 2 tablespoons can be fatal to dogs and even less for cats. Please dispose of Antifreeze Coolant safely and away from animals and your pets. Clean up all spills and dispose of any rags or towels used to clean up Antifreeze Coolant. -
- Remove the lower radiator hose from the thermostat housing. Now the fluid is removed from the radiator, you can remove the lower radiator hose from the thermostat housing. Again using the adjustable joint pliers, or flat head screwdriver depending on which hose clamp is being used, loosen the hose clamp and move away from the thermostat housing neck so you can remove the radiator hose from the thermostat housing. Gently start pulling the radiator hose off the thermostat housing by hand. You may need to use a flat head screwdriver to loosen the hose free. Do this gently and carefully, you do not want to put a hole or tear the radiator hose.
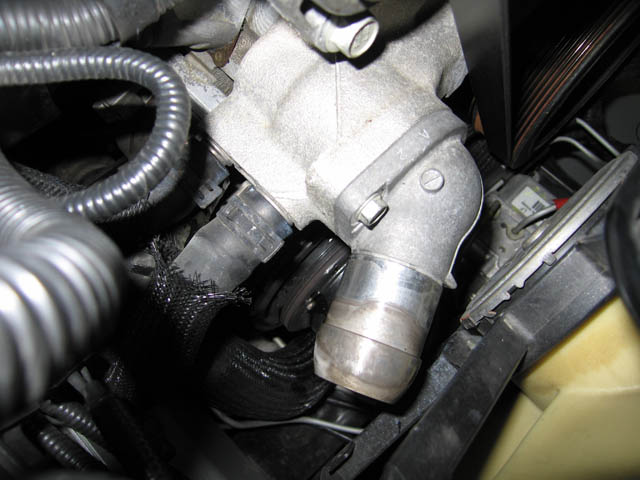
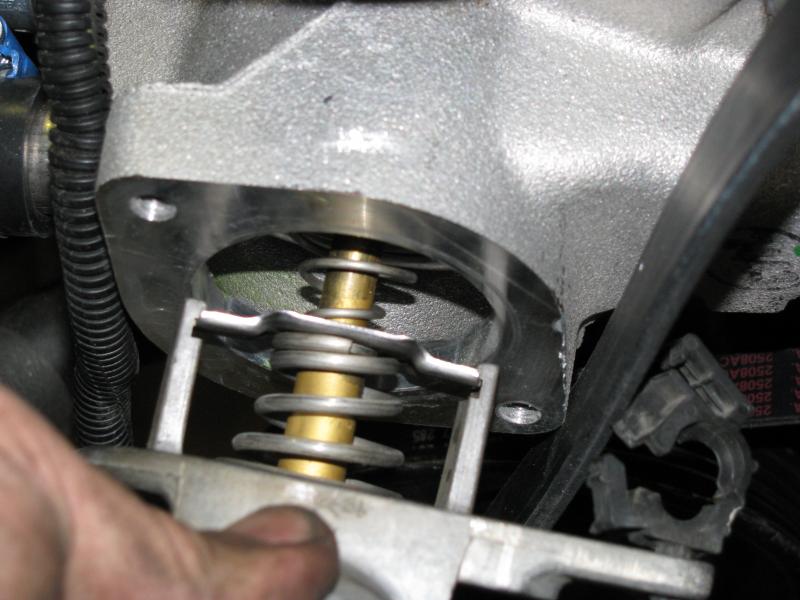
- Remove the thermostat housing. There are two bolts that hold the thermostat housing on to secure it to the water pump. Use your 10mm deep well socket with the 1/4″ drive ratchet. Loosen the 2 bolts. The other bolt is located diagonally just on the other side of the water neck of the housing (not pictured). Remove the bolts by hand being careful not to drop the bolts. With both bolts removed, gently pull on the thermostat housing to remove the housing along with the thermostat. You may need to use slight force, but it will come off. Be prepared for more coolant to drip, this is normal.
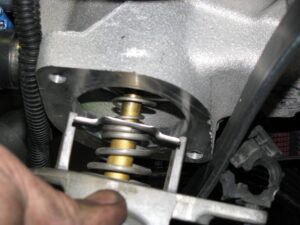
- Remove the thermostat from the thermostat housing. Take note of the direction and the way it sits in the housing. The thermostat will come out most of the time with the seal still attached to the thermostat. If the seal is still sitting in the recessed area of the backside of the housing, remove this as well. Before installing the new thermostat we are going to do slight preparation to prevent any coolant leaks. Taking a red scuff pad, gently sand the back of the thermostat housing that seats against the water pump. Remove any dirt and debris and make the surface clean and smooth. You do not need to sand hard, we are cleaning it more than sanding the part. Do the same to the surface of the water pump where the thermostat housing sits. Gently sand dirt and debris off of the surface leaving it clean and smooth.

- Install the new seal on the new thermostat. There is no right or wrong way here. Just be sure the thermostat is sitting in the grooved portion of the seal all the way around.
-
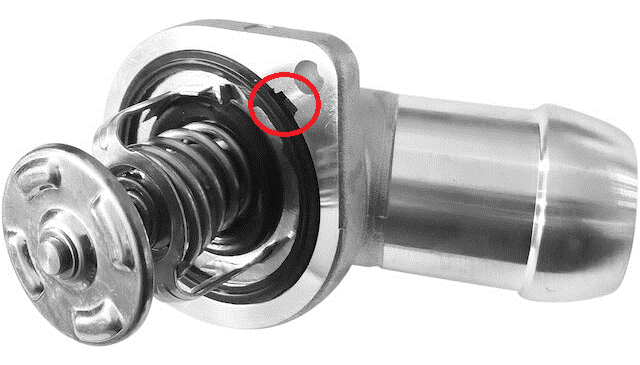
- Install the thermostat into the thermostat housing. There is a right and wrong way here. Be sure the tabs on the seal of the thermostat match up with the recessed tabs on the back of the thermostat housing. The thermostat seal must fit perfectly in the recessed area of the housing. This sounds much harder than it is. Line up the seal with the recessed area of the housing, much like a jigsaw puzzle piece, there is only one way it will fit properly. There are tabs on the seal that match the tab area of the recessed area on the housing. If lined up correctly the thermostat and seal will seat firmly in place and will be ready to be installed back onto the water pump. The pictures below show the tabs of the seal lining up with the tab area of the housing.
-
- Install the thermostat housing and thermostat. Place the thermostat housing with the new thermostat installed onto the water pump. There is only one way it can go on, the water neck must be facing outward toward the fenders. Put a small dab of blue thread lock on each thermostat housing bolt before installing. This will keep the bolts from loosening and stay torqued correctly to prevent coolant leaks.

The housing will probably not fit flush because the thermostat is sprung in the closed position, so get it as close as you can and install the two housing bolts by hand. Using a ratchet and the 10mm socket, gently and evenly tighten the bolts down. Do not use a lot of force to tighten the bolts just get it flush with the water pump and stop there. The thermostat housing and the water pump are both made of aluminum and can crack with excess force on the bolts. - Torque down the bolts. For the next step, you will be using a torque wrench. You can use either foot-pounds or inch-pounds setting. Using a 1/4″ torque wrench, tighten the thermostat housing bolts to 10 lb-ft (14 N.m). You can also use the inch-pounds measurement torquing the bolts to 120 in-lbs. This is not very hard to achieve, which is why I recommend using a torque wrench to assure you do not over-tighten the bolts. If done properly you will not receive any coolant leaks.
- Reinstall the lower radiator hose. Now that the thermostat housing is tightened down, you can place the lower radiator hose back onto the housing. Use the adjustable joint pliers or flat head screwdriver, depending on which hose clamp you are working with, and place the clamps back in place. Be sure you are placing the clamps far enough on the necks that the hose clamp is holding the radiator hose fully into place.
- Fill the radiator with coolant. Once the hoses are securely back in place, you can begin filling the radiator with the new antifreeze coolant. Use the DexCool “Ready To Use” Antifreeze.

2004 Pontiac GTO – To fill the radiator you will actually be filling the coolant reservoir tank. Fill the coolant reservoir tank until the fluid is slightly above the “cold” fill level.
2005-2006 Pontiac GTO – Fill the radiator using the radiator cap hole. Completely fill the radiator until it can not take any more fluid. Do this slowly. Pour some coolant in and then wait a few seconds in between pours. This will force any air bubbles in the radiator to rise to the top. As you get closer to being full, you will see bubbles rising. Fill the radiator completely and do not put the radiator cap back on until you see no more air bubbles in the fluid. - Start the vehicle and check for leaks. While the vehicle is running check for any drips and leaks. If you followed all the steps correctly, you should see no leaks. Let the car run for a few minutes to allow the coolant to run through the water pump. Shut the car off and check your coolant levels. Add more if needed. Start the car again and let run until the engine is warm. Check your temperature gauge and make sure the engine is not overheating Reinstall the radiator shroud/air baffle and you are done.


| Note: I hope you found the information contained on this website useful. Many hours of time and research have gone into building this website. Please feel free to donate to Mark Quitter Racing. Donations will be used to pay for website services or for any other practical use per your request which can be filled out on the PayPal donation link. There is no minimum amount, and your contribution is greatly appreciated. Donate here. |
Use your Speed Perks Rewards on ANY purchase at AdvanceAutoParts.com! Not a Speed Perks Member? Sign up TODAY!