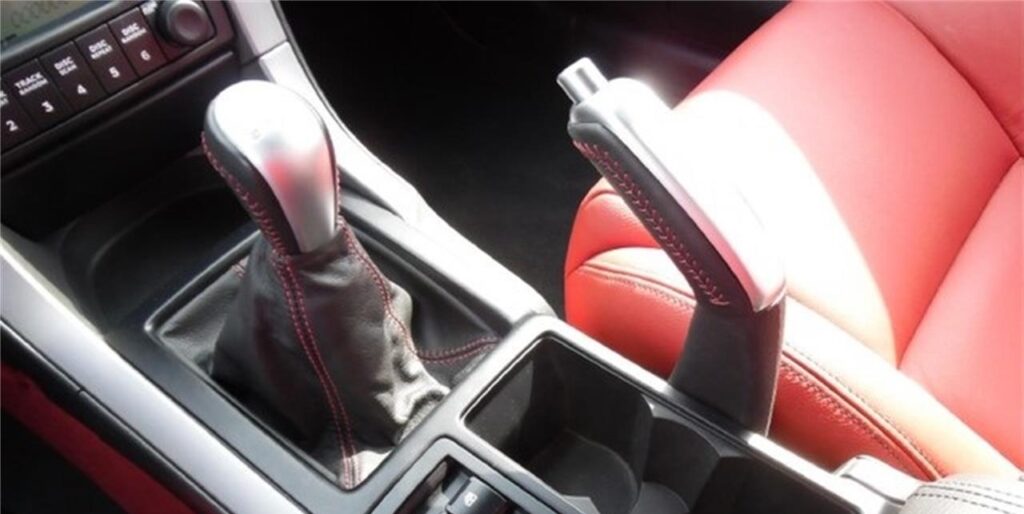
The parking brake is often overlooked by most owners using an automatic transmission, but for manual transmission owners, the parking brake is a must. A properly functioning parking brake gives a piece of mind that your car is not going to roll forward or backward when the car is in Park or in the Neutral position of the transmission.
When you pull on the parking brake lever, it puts tension on a cable that runs to both of the rear wheels. The cable is attached to the parking brake pads or “shoes”, which expand inside the rear brake rotors, preventing the brake rotors from spinning, hence preventing the wheel from rolling.
Over time the parking brake will loosen and it will take more pulls and clicks on the parking brake lever to engage the parking brake. This is usually caused by the brake pad shoes wearing down a bit and the parking brake cables stretching out from nothing more than time and use, or a combination of both. This is all perfectly normal and does not necessarily mean you need brake pad shoes or need new parking brake cables.
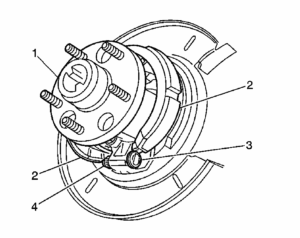
A properly adjusted parking brake will engage between 4 and 6 clicks on the parking brake handle. There are 2 adjustments on the parking brake system. The first one is on the parking brake shoes assembly themselves, which you can find behind the brake rotors of both left and right rear wheels. Behind the brake rotors, you will find the parking brake shoes and they work very similarly to the old style drum brakes. On the bottom of the parking brake pads shoes, there is a star wheel separating the left and right portion of the brake pad/shoes assembly. This wheel can be adjusted to tighten or loosen the amount of tension put on the inside of the brake rotors (#4 on the figure below). This adjustment is and should be done when you replace your brake pads and/or rotors. You can find more information about this by downloading the service manual found here or go directly to the parking brake section of the service manual found here.
The second way to adjust the parking brake is more than likely going to fix the problem and adjust the parking brake lever to engage properly. This is assuming your brakes are in good condition and not in need of service. As stated above, the parking brake handle should engage the parking brake in 4 to 6 clicks. What this means is at no more than 6 clicks of pulling up on the parking brake lever, the parking brake should be engaged and the vehicle should be locked in place and not roll forward or backward in the Neutral position. Below you will find the inspection and adjusting procedure to set the parking brake lever to engage the parking brakes.
Parking Brake Adjustment
Inspection Procedure
1. Shift the transmission into NEUTRAL.
2. Raise and support the vehicle. Refer to Lifting and Jacking the Vehicle in General Information.
3. Support the rear suspension with jacks in order to maintain the correct angle of the lower control arms.
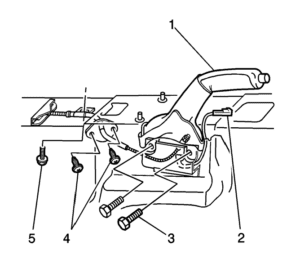
4. Apply the parking brake (1).
Count the number of clicks or ratchet notches.
Specification
- The minimum number of clicks is 4.
- The maximum number of clicks is 6.
5. Attempt to rotate the rear wheels. Verify the rear wheels do not rotate.
6. Release the parking brake.
7. Attempt to rotate the rear wheels. Verify the rear wheels rotate freely.
8. Turn the ignition switch to the ON position. Verify the red BRAKE warning indicator is OFF.
9. Turn the ignition switch to the OFF position.
10. If the park brake lever travel is correct, lower the vehicle.
If the park brake lever travel is not correct, complete the Adjustment Procedure.
Adjustment Procedure
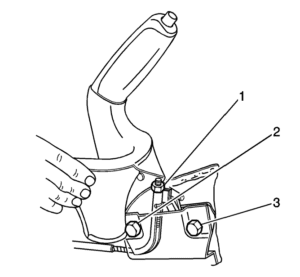
1. Pull the park brake lever boot to the side.
2. Loosen the parking brake cable adjustment nut (1).
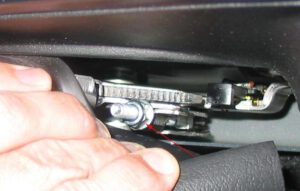
3. Apply the park brake 5 clicks.
4. Use a dial-type torque wrench and a deep socket in order to tighten the adjustment nut:
Tighten Tighten the adjustment nut to 2.0 N·m (17.7 lb in).
5. Attempt to rotate the rear wheels. Verify the rear wheels do not rotate.
6. If the park brake lever travel is correct, lower the vehicle.
If the park brake lever travel is not correct, continue with this procedure.
7. Release the parking brake.
8. Remove the rear tire and wheel assemblies. Refer to Tire and Wheel Removal and Installation in Tires and Wheels.
9. If necessary, loosen the parking brake cable adjustment nut in order to ensure slack in the park brake cables.
10. If necessary, reposition and support the rear caliper and the rear pads. Refer to Rear Disc Brake Pads Replacement in Disc Brakes.
11. If necessary, clean and secure the rear brake rotor to the hub. Refer to the cleaning and securing procedure in Brake Rotor Assembled Lateral Runout Measurement in Disc Brakes.
12. Remove the 2 park brake adjuster hole covers from the rotor.
13. Insert a screwdriver, or an equivalent lever, through an access hole in the rotor.
14. Tighten the adjuster in order to expand the park brake shoe until the rotor locks.
15. Loosen the adjuster approximately 4 notches in order to adjust the shoe to the proper distance away from the drum portion of the rotor.
16. Attempt to rotate the rear rotors. Verify the rear rotors rotate freely.
17. Verify the park brake adjustment is correct. Complete the Inspection Procedure.
18. Verify the parking brake cable adjustment nut is properly adjusted.
19. Install the 2 adjuster hole covers to the rotor.
20. If you repositioned the caliper and the pads, install the caliper and the pads. Refer to Rear Disc Brake Pads Replacement in Disc Brakes.
21. Install the tire and wheel assemblies. Refer to Tire and Wheel Removal and Installation in Tires and Wheels.
22. Remove the jacks.
23. Lower the vehicle.
| DOWNLOAD (.pdf format) |
| 2004-2006 Pontiac GTO Parking Brake Adjustment |
| Note: I hope you found the information contained on this website useful. Many hours of time and research have gone into building this website. Please feel free to donate to Mark Quitter Racing. Donations will be used to pay for website services or for any other practical use per your request which can be filled out on the PayPal donation link. There is no minimum amount, and your contribution is greatly appreciated. Donate here. |
Save 15% INSTANTLY ON Carquest Premium or Professional Brake Bundles. Offer valid on Carquest Professional Platinum OR Carquest Premium Gold Brake Pad

