
The recommended oil change on 2004-2006 Pontiac GTO is every 3000 miles according to the service manual maintenance schedule. Most of today’s synthetic oil claims you go as long as 5000 miles, and some even claim up to 7000 miles before you need an oil change. I personally say you should follow the guidelines set forth by the service manual and change your oil every 3000 miles.
If you see the “Service Engine Oil” message on the instrument cluster dash (image above), this is an indicator that it is time to change your oil. Hopefully, if you follow the service manual, you will change your oil before this message appears.
So What Is The Purpose Of Changing The Oil?
First, we need to know the function of the oil in an engine. Oil is a lubricant that keeps all of the moving parts of an engine from creating excess heat from friction. The pistons, crankshaft, connecting rods, camshaft, and cylinder head valves all need the benefits of oil to keep rotating freely inside the engine, without resistance and without creating excessive heat. Every part of the engine is made of some form of metal. When metal rubs against metal it causes friction, which in turn causes heat. The oil lubricates all of the moving parts which allows them to move freely within the engine, reducing friction and drastically reducing heat.
Over time the oil will begin to break down and not become as slick and lubricating as it was when it was new. This is mainly caused by the engine oil becoming dirty from the natural dirt that builds up in the engine over time. Oil changes help to reduce and remove any excess dirt that can build up in your engine from use. Sludge is also a common development in cars, and oil changes will completely remove it for a more efficient running engine. Oil changes help and contribute to the cleanliness of your engine, as well as keeping all of the moving parts of the engine lubricated and working properly.
Oil Viscosity
Engine oil viscosity refers to how easily oil pours at a specified temperature. Thin oils have lower viscosity and pour more easily at low temperatures than thicker oils that have a higher viscosity. Thin oils reduce friction in engines and help engines start quickly during cold weather.
There are two different grades of oil, straight weight and multigrade or sometimes called multi-viscosity. Straight weight oil will have a grade on the bottle such as SAE30, meaning this is just straight 30 weight oil. The “SAE” is an acronym for “Society of Automotive Engineers”. The Society of Automotive Engineers developed a scale for both engine and transmission oil grades. Multi-viscosity oils will have a grade on the bottle such as 5W-30. Oils with viscosity grades are the industry standard for automotive applications.
Viscosity is notated using the common classification “XW-XX”. The first set of numbers is followed by a “W”. That W stands for “winter” and is a shorthand that tells you that you’re dealing with a multigrade oil that’s been tested to pump at extremely cold temperatures. The number preceding the W rates the oil’s flow or viscosity, at zero degrees Fahrenheit (-17.8° degrees Celsius). The lower the number, the less the oil thickens in cold weather. The second set of numbers indicates viscosity at 100° degrees Celsius (212° degrees Fahrenheit) and represents the oil’s resistance to thinning at high temperatures.
For instance, oil with a 5W-30 grade thickens less than oil with a 10W-30 grade in cold weather. Oil with a 5W-30 grade thins out more quickly at high temperatures as compared to oils with a 5W-40 grade. Viscosity measurement rules are the same whether you choose a normal conventional motor oil or a high-tech natural gas-derived full synthetic motor oil.
Synthetic Oil vs. Conventional Oil
Is synthetic oil better than conventional oil? Absolutely! Conventional oil does not last as long as synthetic oil and needs to be changed much more often. It breaks down much faster than synthetic oil and loses its protective qualities putting your engine at risk for mechanical failure and reducing the life of the engine. The following is taken directly from the Mobil Oil Company website:
“Overall, full synthetic oils provide better engine performance and protection than conventional and synthetic blend motor oils. Mobil 1™ advanced full synthetic motor oils are specially formulated with a tailored additive system that provides additional performance benefits above and beyond those found with conventional and synthetic blend oils by”:
Advantages of full synthetic oil:
|
Use The Correct Recommended Oil For Your Car
I can’t stress this enough, do not use any other oil in your car besides what is recommended by the auto manufacturer. Using the wrong weight or viscosity oil can lead you right down the path of mechanical problems, or even worse, premature engine failure. Using too heavy an oil can put stress on the moving engine parts, and using too light of oil can cause engine parts not to be lubricated enough causing heat and friction which will cause eventual engine failure. Signs that you have used the wrong oil can include a burning smell, oil leaks, engine noises, and low fuel efficiency.
CHANGING YOUR OIL: 2004-2006 Pontiac GTO
What You Will Need:
| PARTS | AMOUNT NEEDED |
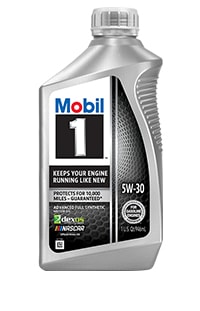
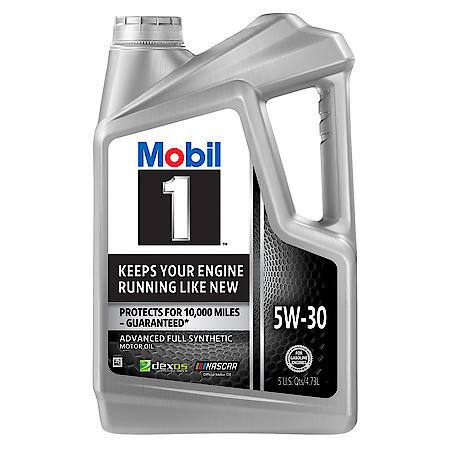
| 5W-30 Full Synthetic Engine Oil – Recommend Mobil 1 | 7 Quarts. Fill oil to the full line on the oil dipstick, then add 1/2 to no more than 1 quart more. It will take 6 1/2 (6.5) quarts in total to fill, which will be slightly over the full mark on the dipstick as recommended. |
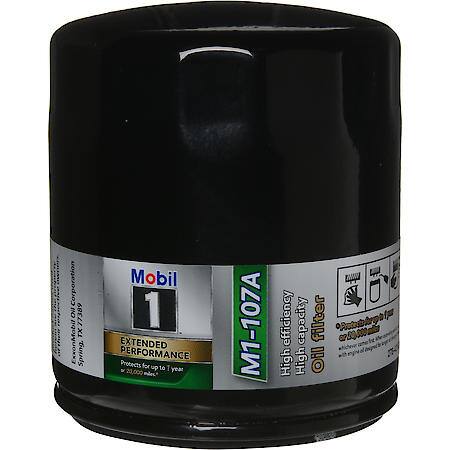
| Oil Filter – Recommend Mobil 1 # M1-107A | 1 |
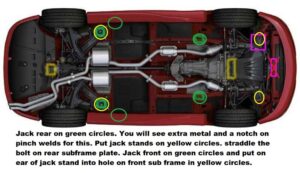
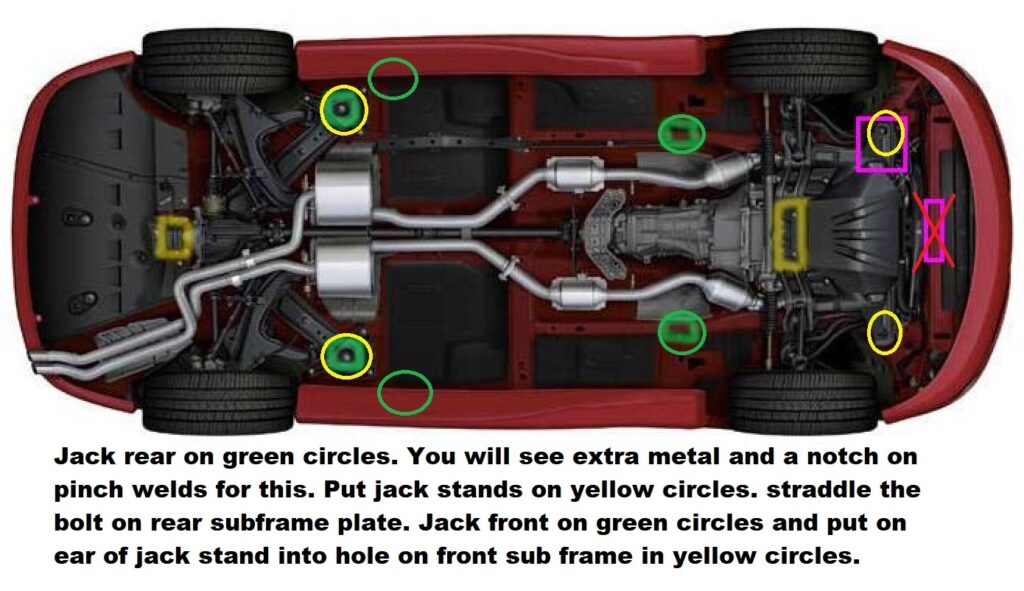
- Lifting the vehicle. Jack up the car on the left side (driver’s side) and place it on a jack stand. Use the “Jacking Points” section for reference. Leave just enough room to crawl under the front of the car to reach the oil pan and oil filter. Ramps can be used, but I have found on the ramps not as much oil is drained out of the oil pan. This is also why I say to jack up on the left side and use the least amount of height needed to work under the car. This allows as much of the old oil to be drained out as possible at this angle.
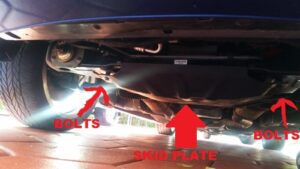
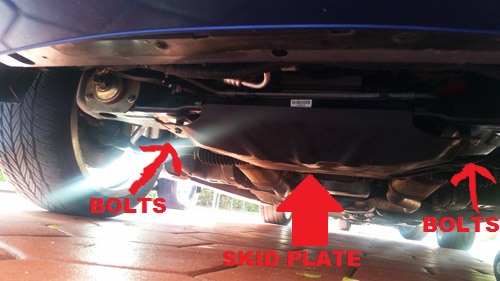
- Remove the skid plate/Oil Pan Protection Shield. Using a 13mm socket, remove the 4 bolts holding on the skid plate to the underbody located directly under the engine. This will allow access to the oil pan drain plug and oil filter.
- Drain the oil. With the skid plate removed, place an oil drain pan under the oil pan. Use a 13mm socket to remove the oil drain plug located on the bottom of the oil pan. Allow as much oil to drain as possible. Be patient. There is no rush here. This does not have to be a 10-minute oil change, we want to do this the right way.
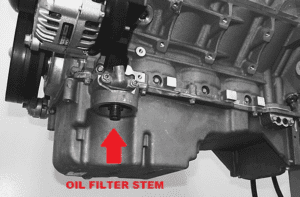
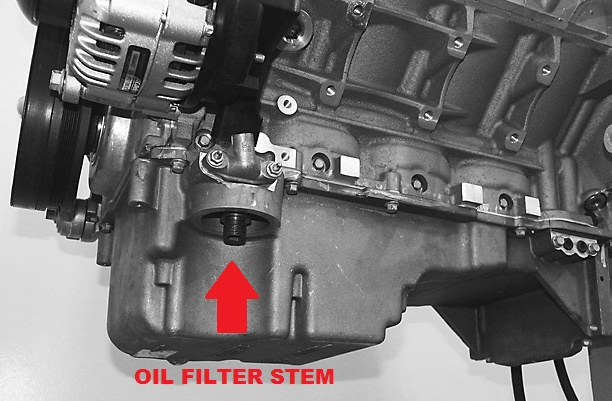
- Remove the oil filter. Using an oil filter wrench, remove the oil filter. Once the oil filter is loose it simply screws off of the oil filter stem turning counterclockwise. Some oil will pour out of the filter, so place the oil drain pan under the filter area as well.
- Prepare to install the new oil filter. Clean the oil filter stem on the engine as well as the surface of the oil filter contacts. Get any excess oil and dirt off of the oil filter area before installing the new filter.
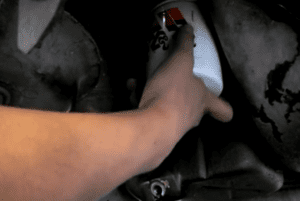
- Install the new oil filter. Before screwing the new oil filter on, using your finger place some fresh oil around the rubber gasket of the new oil filter. Simply dip your finger in the oil and spread the oil around the rubber oil filter gasket. This prevents the gasket from tearing or ripping when you tighten it down and creates a seal to prevent oil leaks from the filter. Screw the filter on clockwise until hand tight. Then using your oil filter wrench, turn an additional 1/4 (quarter) of a turn. The oil filter does not need to go on super tight. Hand-tight and a quarter turn more is all it will need. The service manual calls for the oil filter to be tightened to 22 ft-lbs (30 N.m). Most GTO owners will say this is excessive, but if you would like to go by the service manual, you are more than welcome to.
- Re-install the oil pan drain plug. Tighten to 18 ft-lbs (25 N.m) torque specs. If you do not have a torque wrench, then hand tight with a ratchet (tighten until slight resistance) and a quarter turn more.
- Add the new oil. Pop the hood and start adding oil. Add 5 quarts, no need to check the oil dipstick, all 5 quarts will be needed. Once all 5 quarts are added, check the oil dipstick. We are looking for the oil level to be right at the full line. Also, look under the car to make sure you have no oil leaks. Again, be patient. No need to rush. Once you see there are no oil leaks, begin adding another quart of oil. I recommend adding half a quart and then checking the oil dipstick again. Keep doing this until you have reached the full line on the oil dipstick. Your end result should be 6 1/2 quarts of oil added in total.
- Re-install the oil pan protective skid plate. Install the 4 bolts that hold the protective skid plate onto the undercarriage. Tighten to 22 ft-lbs (30 N.m)
- Remove the jack stand and jack and lower the vehicle.
- Start the car and let run for a few minutes. This allows oil to run through the oil filter so we can re-check the oil level. Turn the car off.
- Re-check the oil level on the oil dipstick. If the oil level is not at the full line, add a little more oil until the oil is right on the full line of the oil dipstick. Once this is done, add 1/2 to a full quart more. I usually do a half quart, but some will say to add 1 more quart. In my opinion, half a quart more is plenty. Check the oil dipstick again and it should indicate you are right over the full line. The oil change is complete.
- Oil Catch Can – If you have an oil catch can installed on your engine, now would be the time to empty the oil catch can reservoir. Be sure to inspect the oil in the catch reservoir for dirt and debris. Remove the oil catch can reservoir and empty and clean. Re-install the catch can reservoir.
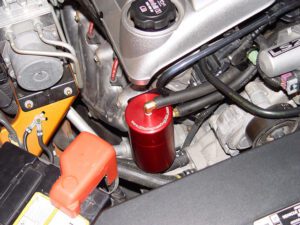
Note: If you do not have an Oil Catch Can installed on your vehicle, I highly recommend you visit the Oil Catch Can section of this website and purchase one immediately. Read the entire section to understand the importance of this engine add-on. - Reset the “service engine oil” message. If the “Service Engine Oil” message has appeared on your dashboard instrument cluster as an indicator to change your oil, you will need to reset this message. You can reset this message by following the instructions found on this website in the section: 2004-2006 Pontiac GTO Service Engine Oil Reset


| Note: I hope you found the information contained on this website useful. Many hours of time and research have gone into building this website. Please feel free to donate to Mark Quitter Racing. Donations will be used to pay for website services or for any other practical use per your request which can be filled out on the PayPal donation link. There is no minimum amount, and your contribution is greatly appreciated. Donate here. |
Save $20 on Oil bundles: Oil + FREE Filter